Setting up on Linux using Docker
Welcome! This tutorial guides you through setting up your Anka Build Cloud on Linux using Docker and Docker-Compose.
Necessary Hardware
- A machine running Linux to install the Anka Controller & Registry.
- A Mac to install Anka CLI as a Node.
While it’s possible to run Docker on mac, it’s not recommended. An Anka Controller & Registry package exists for native macOS if absolutely necessary.
Necessary Software
- Docker
-
Docker-Compose – Be sure to follow the Post Installation setup in order to run docker-compose without using sudo.
What we are doing in this tutorial
- Install the Anka CLI + Create your first VM Template
- Install the Anka Build Cloud Controller & Registry
- Link the Anka CLI Node to the Controller
- Start a VM instance using the Controller UI
Step 1: Get familiar with Anka Virtualization
Please go over our Getting Started guide before proceeding.
Step 2: Install the Anka Build Cloud Controller & Registry
Perform the following steps on the machine intended to run the Controller & Registry and not the node running the Anka Virtualization software.
Download and extract the Controller & Registry
FULL_FILE_NAME=$(echo $(curl -Ls -r 0-1 -o /dev/null -w %{url_effective} https://veertu.com/downloads/ankacontroller-registry-docker-latest) | cut -d/ -f5)
PARTIAL_FILE_NAME=$(echo $FULL_FILE_NAME | awk -F'.tar.gz' '{print $1}')
mkdir -p $PARTIAL_FILE_NAME
cd $PARTIAL_FILE_NAME
curl -Ls https://veertu.com/downloads/ankacontroller-registry-docker-latest -o $FULL_FILE_NAME
tar -xzvf $FULL_FILE_NAME
You can also manually download the file called “Cloud Controller & Registry (Run on Linux Instance)” from the Anka Build Download page.
Configuration
We’ll need to do two things:
-
Set the external registry address – This address is passed to the anka nodes so they can pull VM Templates from the Registry.
-
Mount a volume for the Registry data – The directory containing VM Template/Tag layers/files and configuration metadata.
First, edit the controller/controller.env:
-
Find the variable ANKA_ANKA_REGISTRY and set it to the proper URL (remove the comment). It should look like:
ANKA_ANKA_REGISTRY: http://<ip/fqdn>:8089
Next, edit the docker-compose.yml (in the package root, not under the registry directory):
-
Under
anka-registry > volumes, find the line that says # - ****EDIT_ME****:/mnt/vol. Change this to include the host directory you wish to mount into the container and which will be used to store the data. It should look like:- /var/registry:/mnt/vol
If you’re running these containers on mac (which you should avoid), you need to also change volume source from/var/etcd-dataand/var/registryto a writable location on your mac.
Start the containers
In the root package directory, execute:
docker-compose up -d
Verify the containers are running
docker ps -a

CONTAINER ID        IMAGE                 COMMAND                  CREATED              STATUS              PORTS                    NAMES
aa1de7c150e7        test_anka-controller   "/bin/bash -c 'anka-…"   About a minute ago   Up About a minute   0.0.0.0:80->80/tcp       test_anka-controller_1
0ac3a6f8b0a1        test_anka-registry     "/bin/bash -c 'anka-…"   About a minute ago   Up About a minute   0.0.0.0:8089->8089/tcp   test_anka-registry_1
03787d28d3a3        test_etcd              "/usr/bin/etcd --dat…"   About a minute ago   Up About a minute                            test_etcd_1
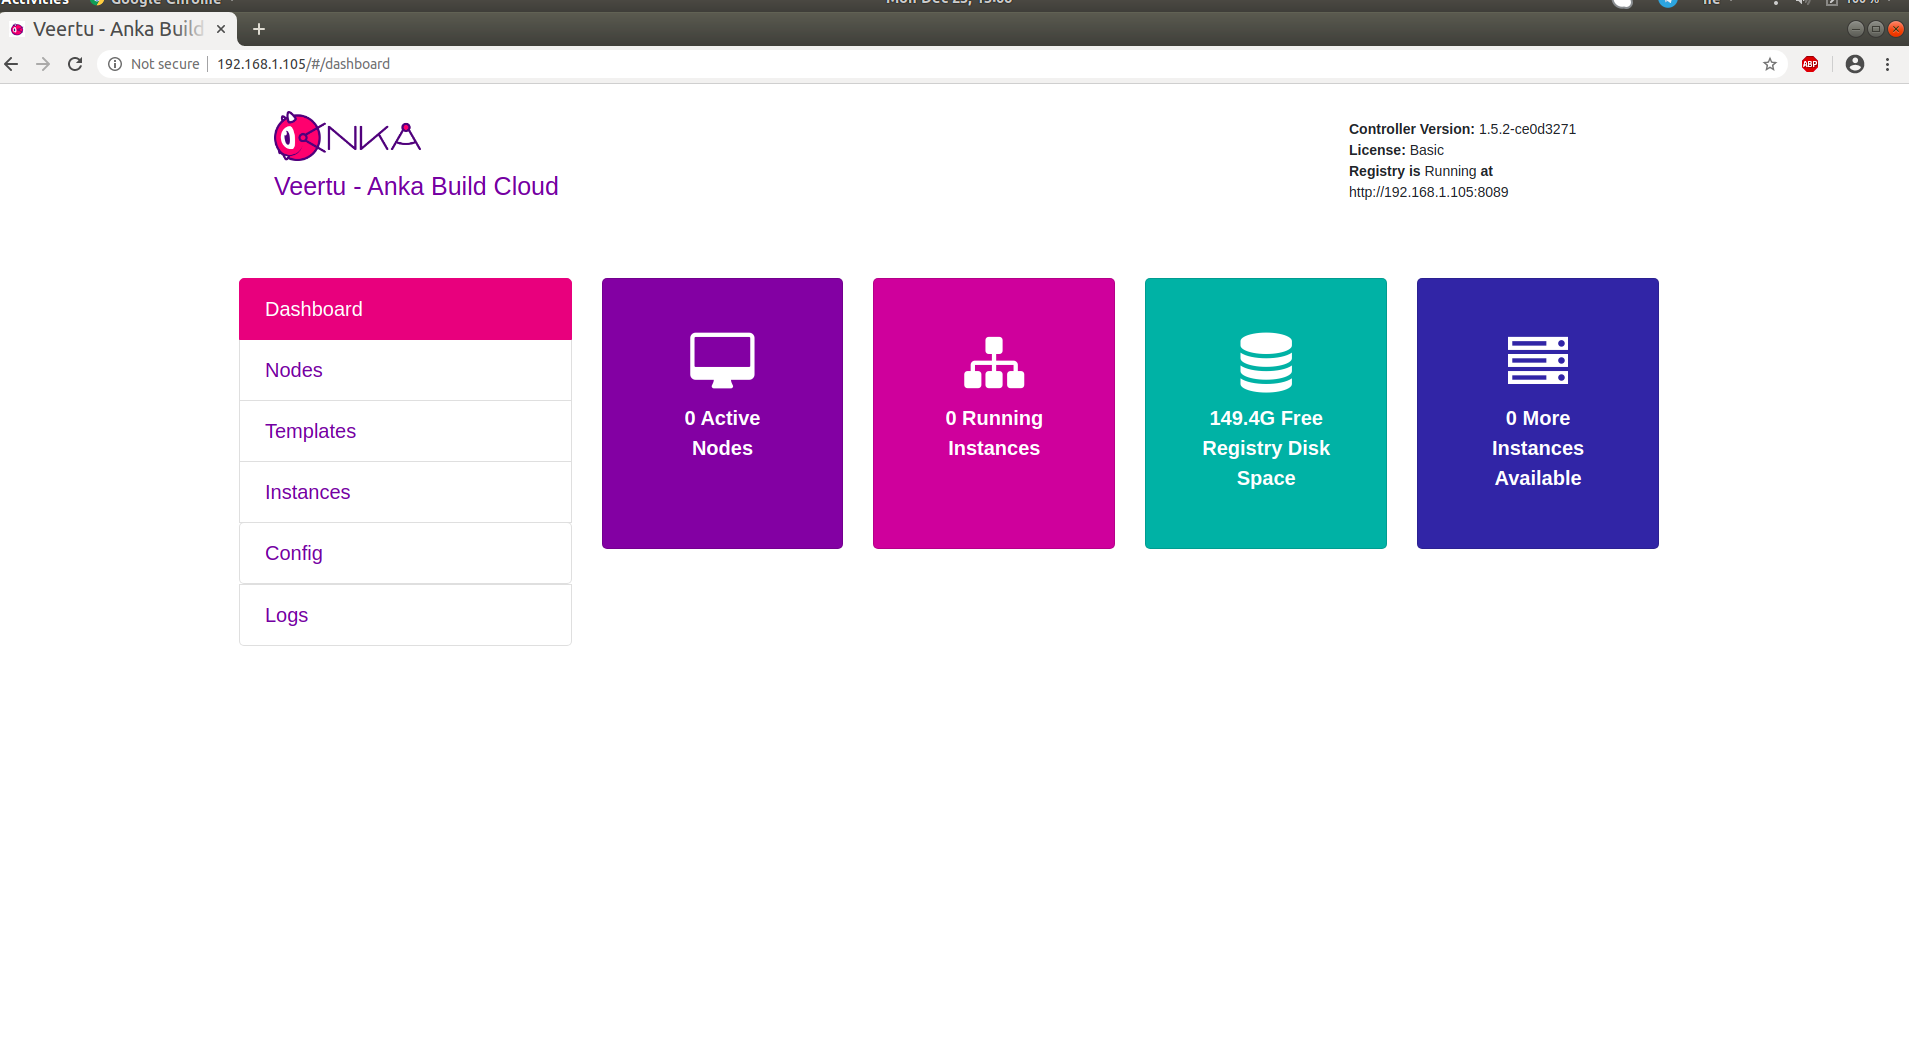
Anka Controller should be listening on port 80 (HTTP). Try pointing your browser to the machine’s IP or hostname. You can use localhost or 127.0.0.1 if you’re on the Controller machine.
Your new dashboard should look like the picture below
Orientation
Let’s take a look at what is now running on your machine:
- Anka Controller is serving web UI and REST API on port 80.
- Anka Registry is serving REST API on port 8089.
- ETCD database server serving on ports 2379 and 2380 (used by Anka Controller).
Configuration and scripts
Any non-default configuration changes are done by editing the .env files, or directly in docker-compose.yml.
A full configuration reference is available.
Logging
Containers are writing logs to STDOUT+ERR, making them available to Docker.
To see the Controller’s logs:
docker logs --tail 100 -f test_anka-controller_1
To see the Registry’s logs:
docker logs --tail 100 -f test_anka-registry_1
Troubleshooting tip
The log level can be modified from the default 0 value. The higher the number, the more verbose the logging. (reference)
Step 3: Link the Anka CLI Node to the Controller
Great! Now that we have our Anka Controller & Registry up and running, let’s add Nodes!
Perform the following steps on the host machine/node where you created your first VM.
Add the Registry
We now need to configure the Registry on this machine so we can push/upload the local VM Template we created earlier. Uploading the Template to the Registry makes it possible to download and run it from other nodes.
Assuming you haven’t changed the default port configuration, your Registry is serving requests on port 8089.
sudo anka registry add <registry name here> http://<ip>:8089
Verify the configuration:
sudo anka registry list-repos
++
++

<registry name you set> (default)

+--------+------------------+
| host   | <the ip you set> |
+--------+------------------+
| scheme | http             |
+--------+------------------+
| port   | 8089             |
+--------+------------------+
Then, confirm the registry list command doesn’t throw any failures:
sudo anka registry list
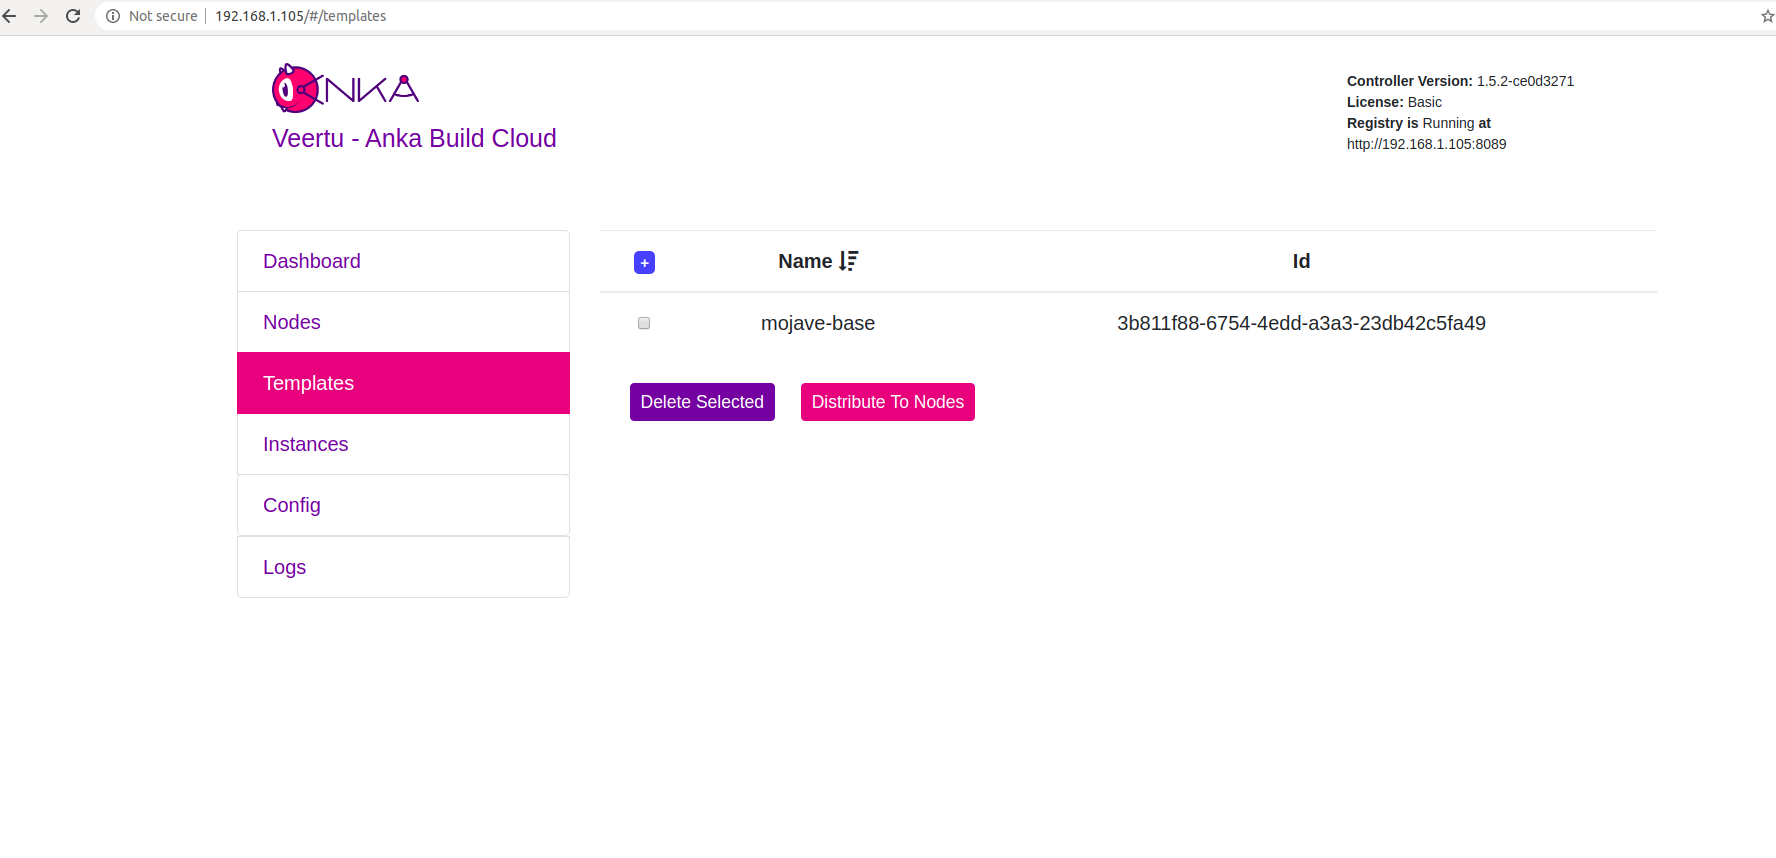
Push the VM to the Registry
sudo anka registry push 12.X -t vanilla
Terminology note: A “VM” becomes a “Template” once it has been pushed to the registry.
After the push completes, you should see your new Template in the Templates section of the Controller UI.
Join to the Controller & Registry
In order for the host/node to perform controller tasks (pull, start, delete, etc), it must be joined to the Anka Build Cloud. You can do this by executing:
If you have any issues with this step, please see our troubleshooting guide.
sudo ankacluster join http://<ip>
Password:
Testing connection to controller...: Ok
Testing connection to the registry...: Ok
Ok
Cluster join success
- Replace
<ip>with the IP of the machine hosting your controller: - If you changed the default port for the controller from 80, you’ll need to use the new port at the end of the IP. Otherwise, leave it off.
The command will hang for a few moments before displaying Cluster join success.
Step 4: Start a VM instance using the Controller UI
-
Go to your Controller dashboard and click on the Instances tab:
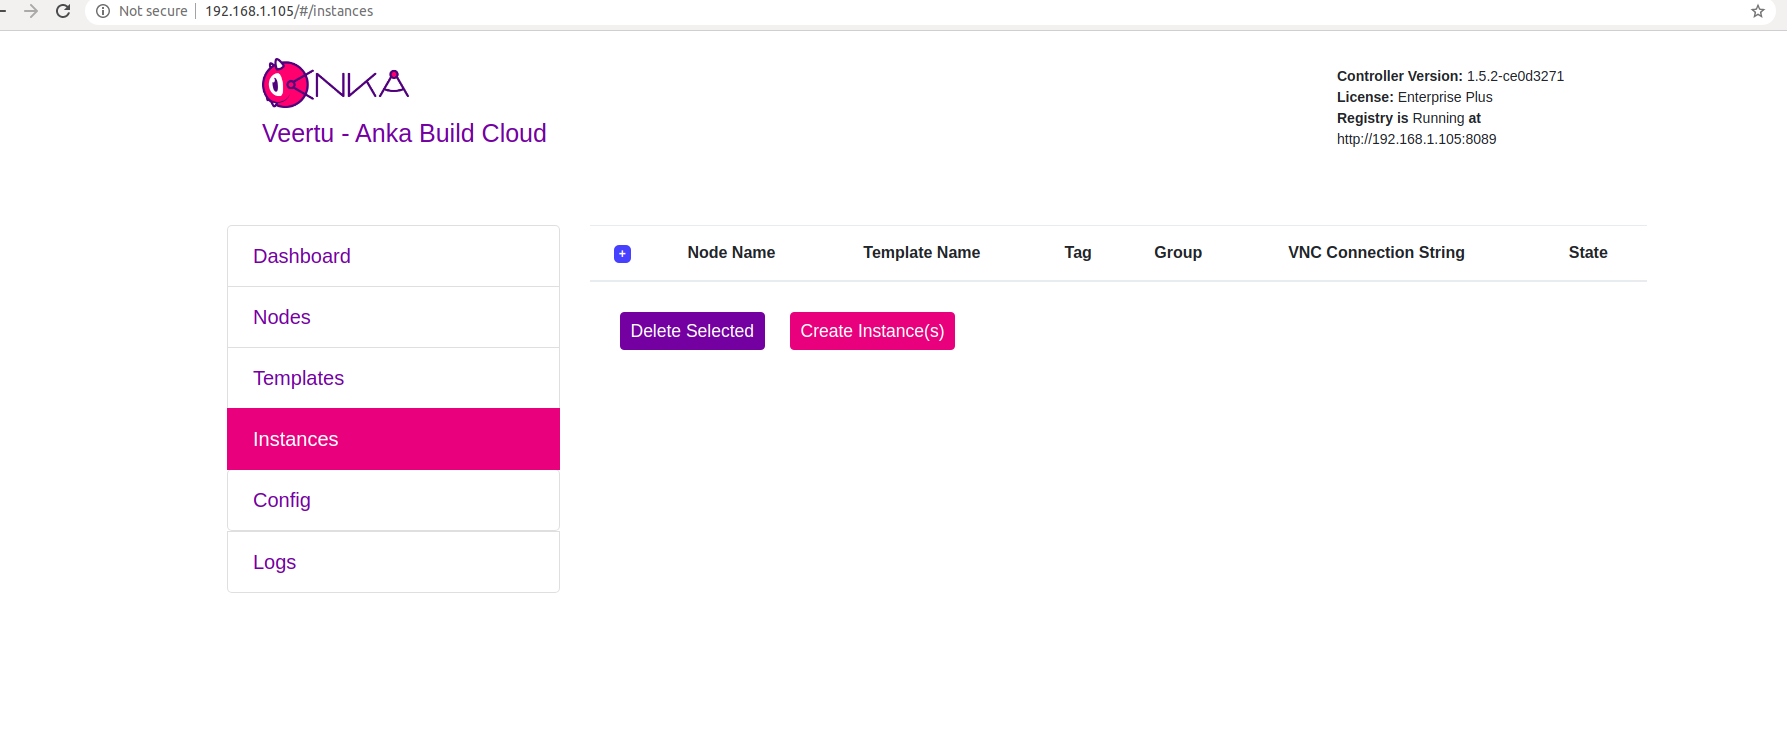
-
Click on Create Instance(s), and the Create New Instances view displays:
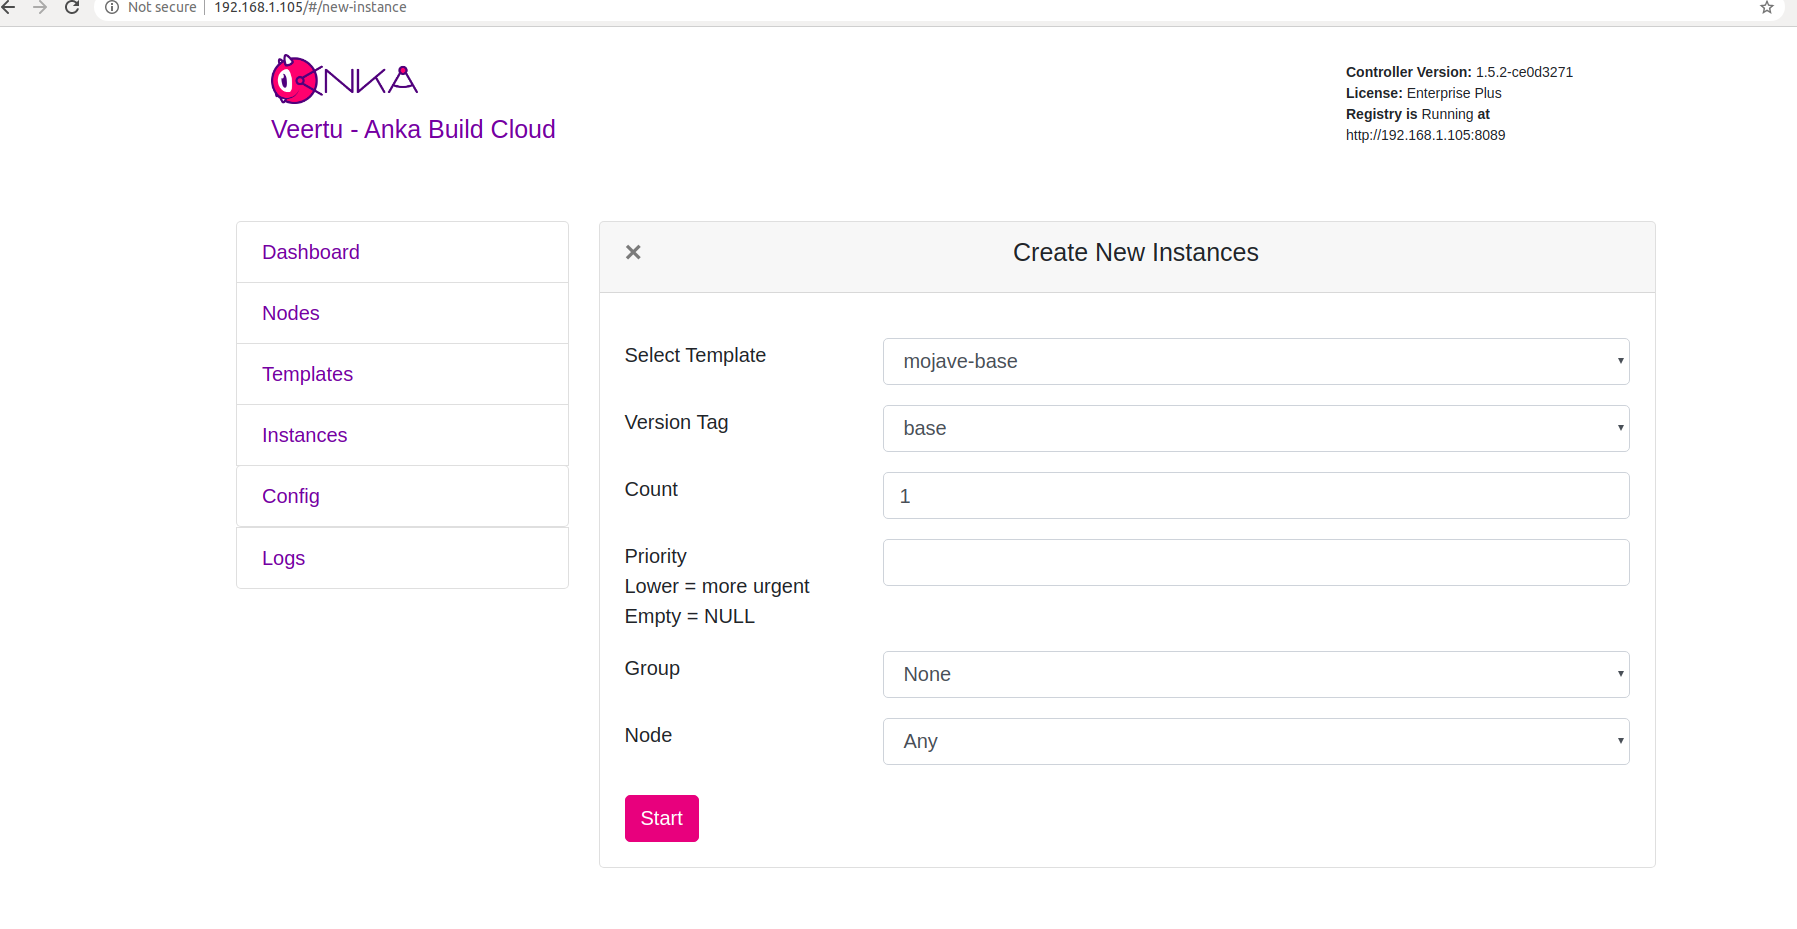
-
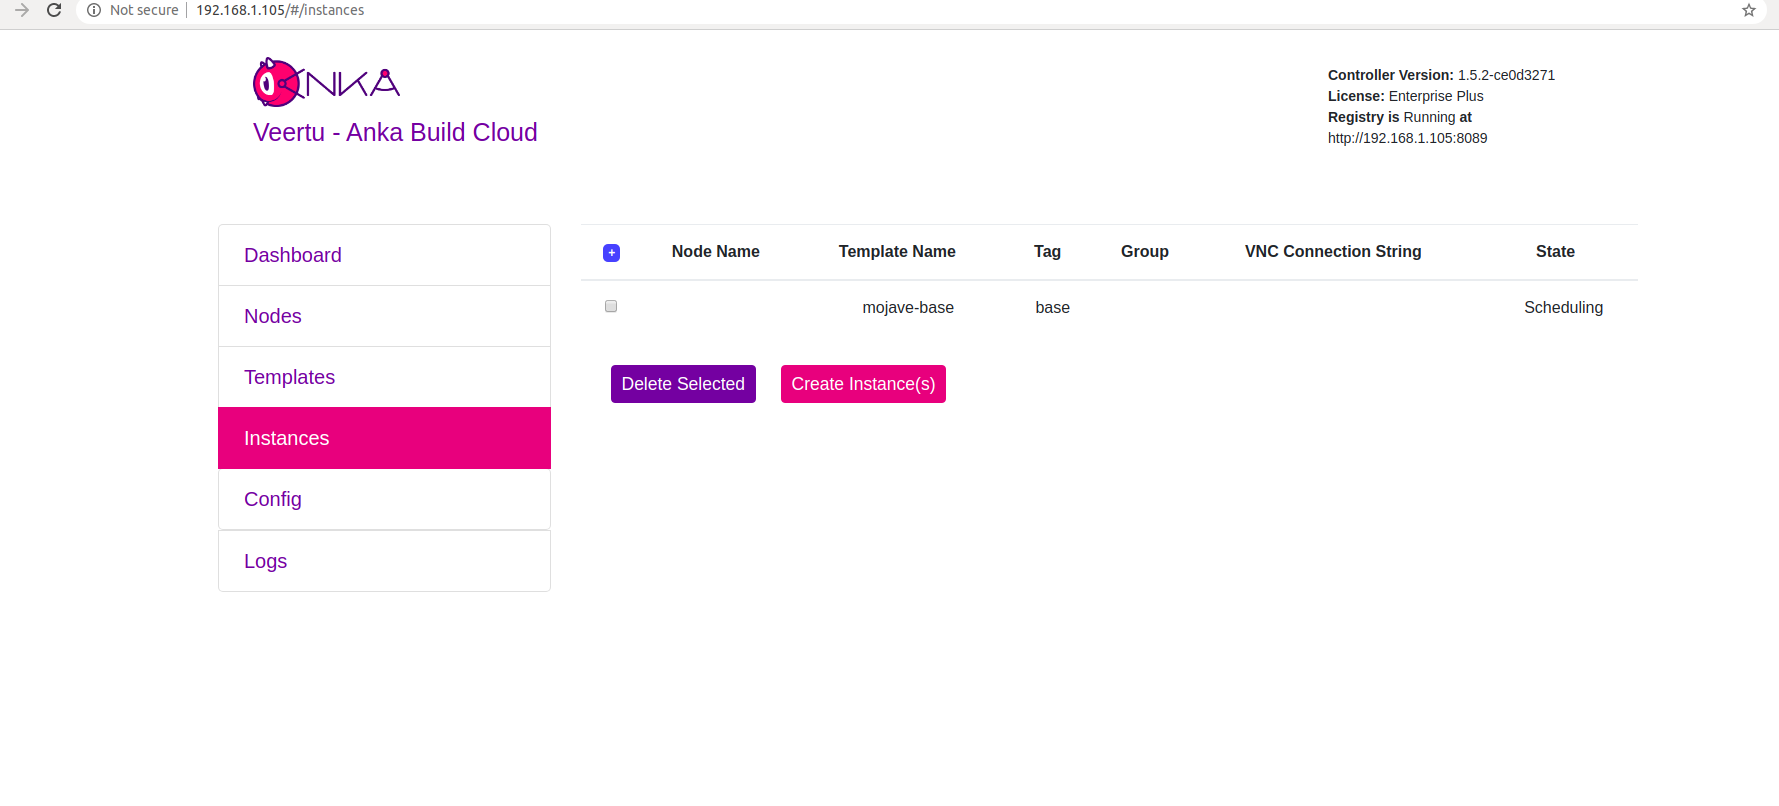
Select the VM Template and click Start. The Create New Instances view closes and returns you to the Instances view. You should now see the Instance in a Scheduling or Pulling State:
-
After the Scheduling and Pulling finishes, the VM starts on one of the Nodes and shows a Started State in the Controller UI:
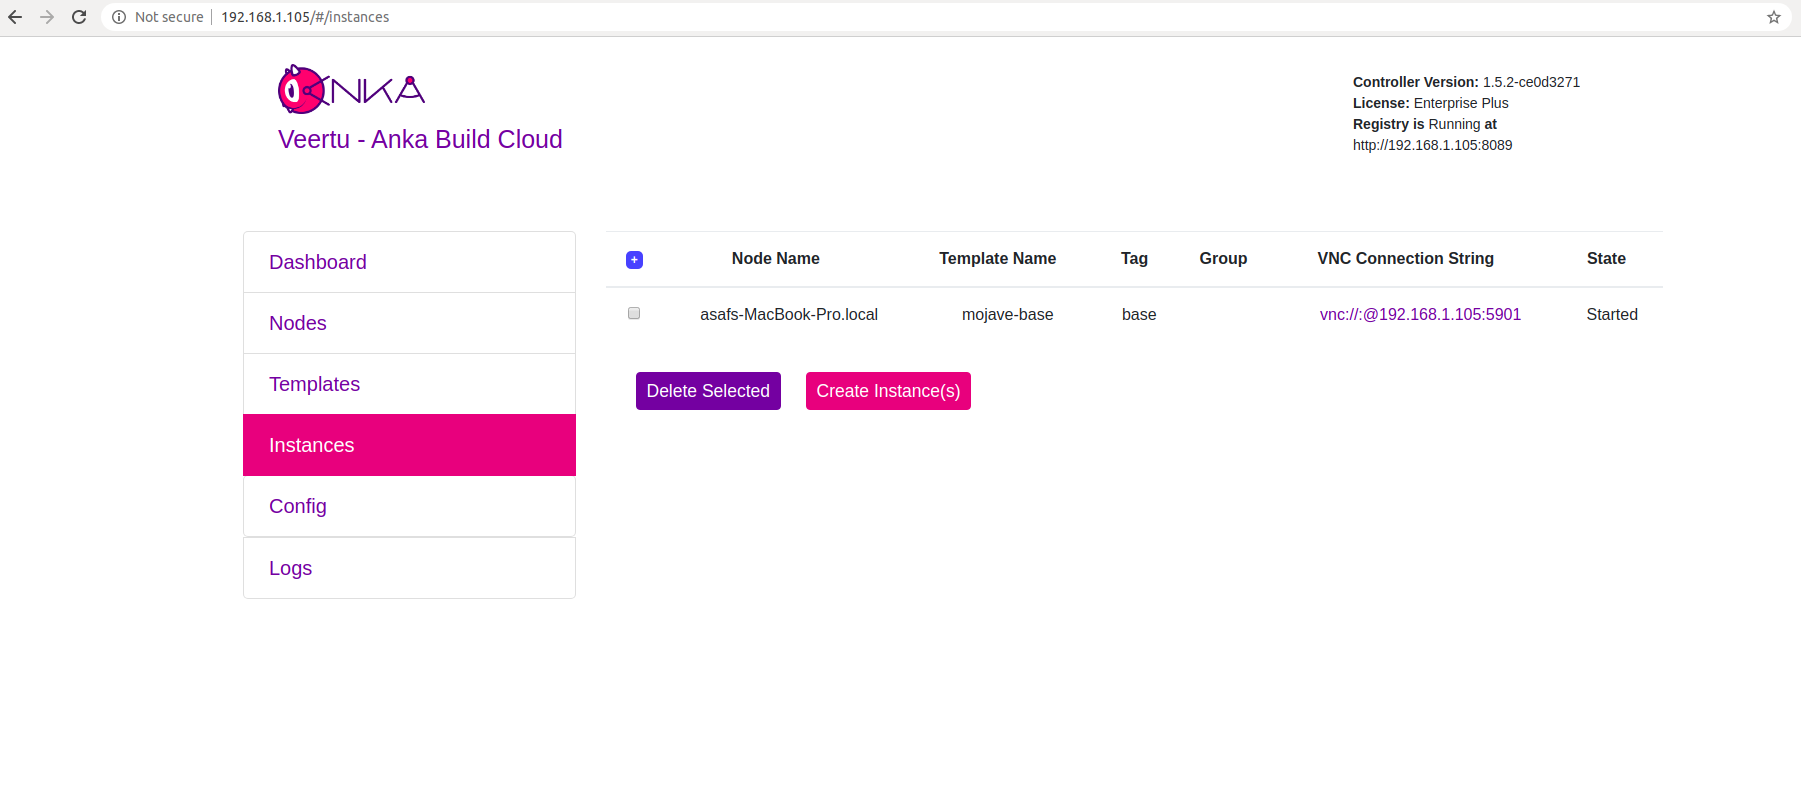
You can now confirm the Instance is running from inside the Node:
- JSON output is available for scripting/automation using
anka --machine-readable
sudo anka --machine-readable list | jq
{
  "status": "OK",
  "body": [
    {
      "status": "suspended",
      "name": "catalina",
      "stop_date": "2020-04-01T21:30:59.798697Z",
      "creation_date": "2020-04-01T00:00:13.656296Z",
      "version": "base",
      "uuid": "10c720eb-dcce-46f7-baa3-28bacef0ec0f"
    },
    {
      "status": "running",
      "name": "mgmtManaged-catalina-1585776660490226000",
      "stop_date": "2020-04-01T21:36:11.742662Z",
      "creation_date": "2020-04-01T21:31:01.055250Z",
      "version": "",
      "uuid": "dcbeb319-421a-4d30-8466-194eb7fa5f75"
    }
  ],
  "message": ""
}
Timestamp format: https://www.ietf.org/rfc/rfc3339.txt
Helpful notes about the containers
Anka Controller
- Default Ports: 80
- Binaries and scripts:
/bin/anka-controller - Configuration files: Configuration is done through docker-compose file or through environment variables.
- Logs will be written to:
/var/log/anka-controller. It’s also possible to get the logs throughdocker logscommand. - Data Storage: No data is saved on the container.
Anka Registry
- Default Ports: 8089
- Binaries and scripts:
/bin/anka-registry - Configuration files: Configuration is done through docker-compose file or through environment variables.
- Logs will be written to:
/var/log/anka-registry. It’s also possible to get the logs throughdocker logscommand. - Registry data will be written to:
/mnt/vol
What next?
- Browse the Anka CLI Command Reference.
- Connect the cloud to your CI software.
- Find out how to use the Controller REST API.
- Learn how to work with USB devices